FileZilla lets you access the files on the hosting directly from your computer. It is a useful(much needed) tool when you need to upload any files or need to make changes to any data on the website hosting. You can easily set up the FileZilla client with your hosting account (BlueHost, DreamHost, Hostinger, GoDaddy, etc.) by following the below-mentioned steps.
FileZilla is free to use. You can use this tool on your Mac, Windows, or Linux computers.
How to setup FileZilla client?
1. Download FileZilla client
Download the FileZilla client from this link, download it as per the Operating System installed on your computer.
2. Install FileZilla client
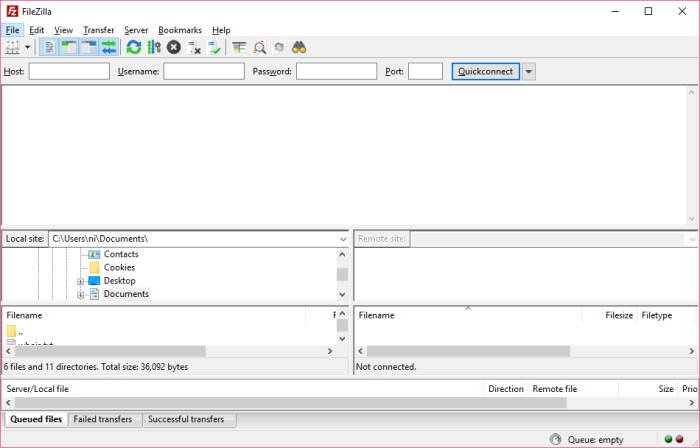
After downloading the tool, install it on your computer. You can see the FileZilla client window in the below image.
3. Create FTP username and Password
Now log in on the cPanel of the hosting account and open the FTP Accounts.
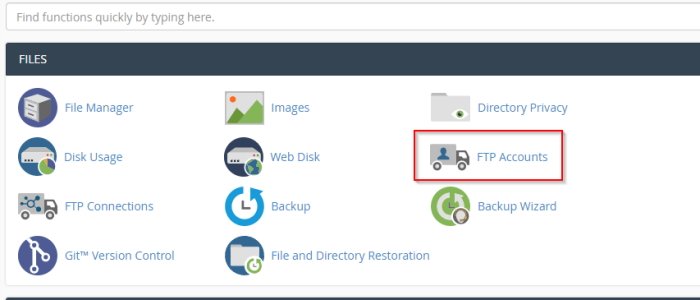
On the FTP account section you can create new FTP account. Some hosting providers already has FTP account and password created(in that case use your cPanel username and password as the FTP login credential).
My recommendation is to create a new FTP account. Create an account as in the image below.
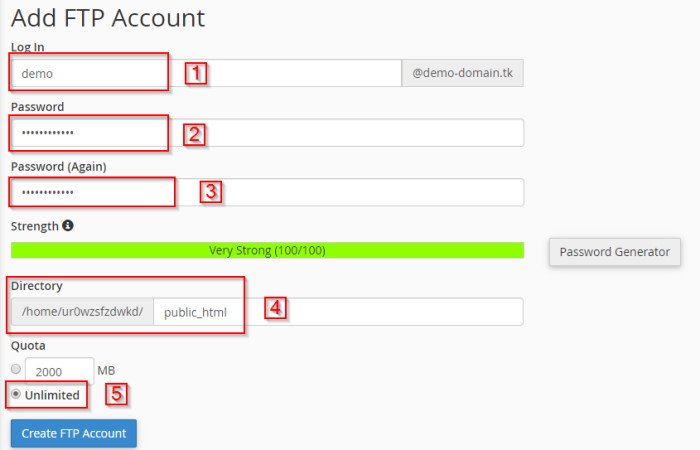
Check the Directory is selected to public_html as in images on point 4. Otherwise, you can not access website files. And finally, create the FTP account.
4. Configure FileZilla client
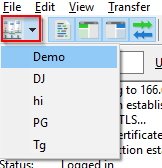
Open the FileZilla client. Open Site manager from the menu. Here you need to save the FTP account details so that you do not need to enter it every time you connect with this FileZilla client.
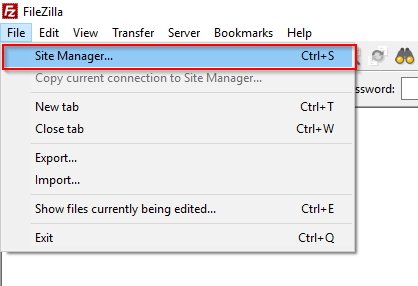
On the site manager you need to add your site.
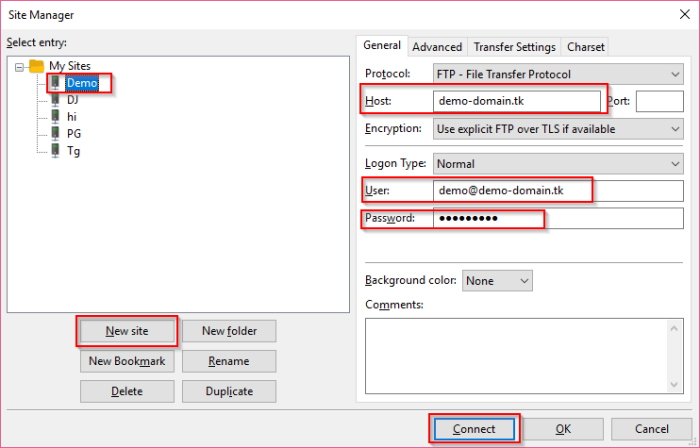
- Click on the New Site and give a name to your site.
- Enter the domain name of the site on the Host box (as I entered demo-domain.tk).
- You can leave the port as it will automatically set up the default port 21. Or you can enter 21 there.
- Enter the FTP username & password you created in the previous step.
After filling all the details click on the connect button.
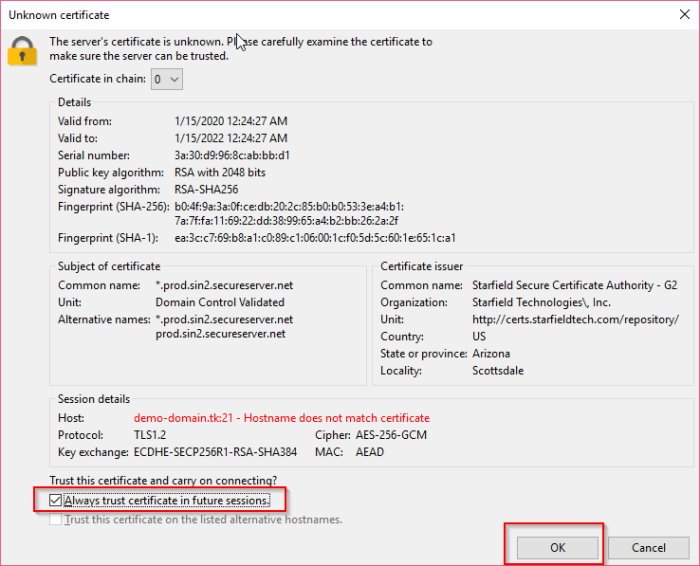
A window will pop up with a header Unknown Certificate. Check the Always trust certificate in future session (so that this pop up does not come up again) and click on the OK button.
Install a free SSL certificate and protect your website with HTTPS security!
The FileZilla client will connect with the hosting account successfully in a few seconds. Now you can see all the files and folders located under the public_html folder on the hosting account.
You can now upload or download any files from the public_html folder or upload any files to the public_html folder.
5. Download files using FileZilla from hosting account
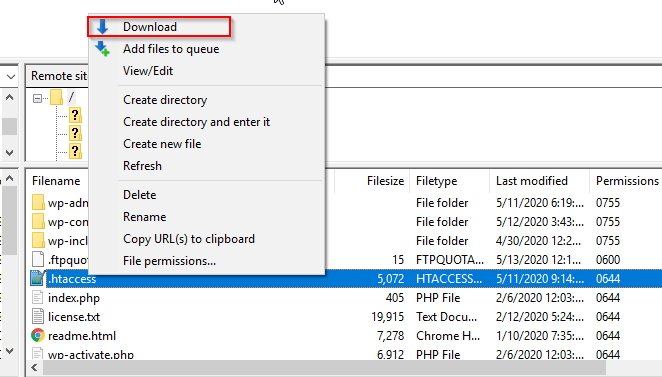
On the right side of the FileZilla window, you can see the remote site, all the files hosted for the website will be displayed here.
Select the file you want to download. Right-click on the file and click on the file. The file will download on the folder selected at the Local site on the left side.
Alternatively you can double-click on the file to download it.
6. Upload files using FileZilla to hosting account
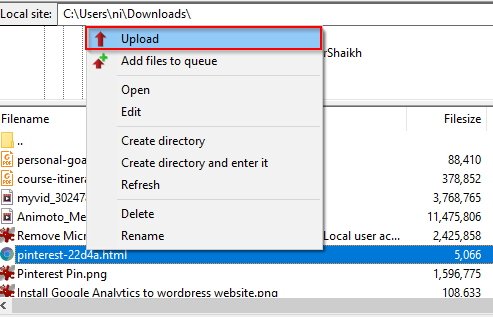
Select the file on the left side (Local site), right-click on the file, and click on Upload. The file will be uploaded immediately.
Alternatively, you can double-click on the file to upload it.
Final thoughts
Your FTP account credential will be saved to the FileZilla client. When you are done with your job you can disconnect the FTP connection by clicking on the disconnect button as the image below.

Next time when you need to access the FTP account, just open the FileZilla application, select the site from the site manager. It will connect automatically.
You can always contact me with any kind of issue. I will definitely get back to you.
Jaded by the 9 to 5 work as an executive in charge of a large enterprise department`s technical direction, he made his way back to his passion. More than dozens of created websites later, he is now an author of a range of programming courses for beginners up to first-rate working professionals.
Write him to nur@positivegeek.com
- Create Custom Mailbox for Free - December 25, 2021
- How to Enable WooCommerce Autofill Checkout Address with Google - August 15, 2021
- How to Manage Affiliate Links Professionally - August 8, 2021


