Improve the user experience on your WooCoomerce website with autofill for the checkout address fields suggested by Google. When the user enters the first few letters of the address, Google will suggest a list of addresses; the user can select an address from the list. All the fields for the address on the checkout page will be filled when someone chooses an address from the Google suggested addresses. See it in action.
If any user does not find their address on the Google suggested list, they can manually enter the address.
This autofill address by Google works for both the billing fields and the shipping fields(if someone selects a different address for shipping).
With the help of this step-by-step guide, you can enable WooCommerce AutoFill Checkout Address(Suggested by Google) with the help of a free plugin.
Enable WooCommerce Autofill Checkout Address
For this, you need to install a free WordPress plugin and Google Maps API key. The plugin is completely free to use, and Google Maps API will charge you after a certain number of hits for the key.
STEP: 1
Install and activate the Address correction autocomplete for Woo plugin on the WordPress site.
STEP: 2
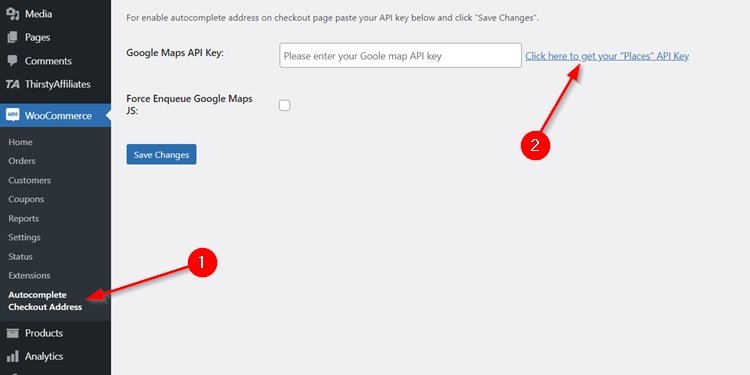
Under the WooCommerce menu, select Autocomplete Checkout Address. You need the Google map API key for the address suggestions. For this, you need to log in to the Google Cloud Platform.
Click on the link displayed on the page, or open this link: https://cloud.google.com/maps-platform/#get-started.
STEP: 3
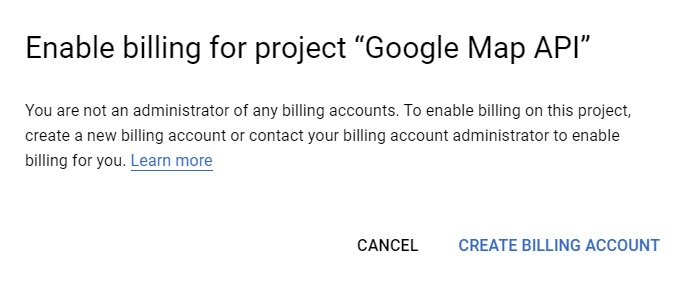
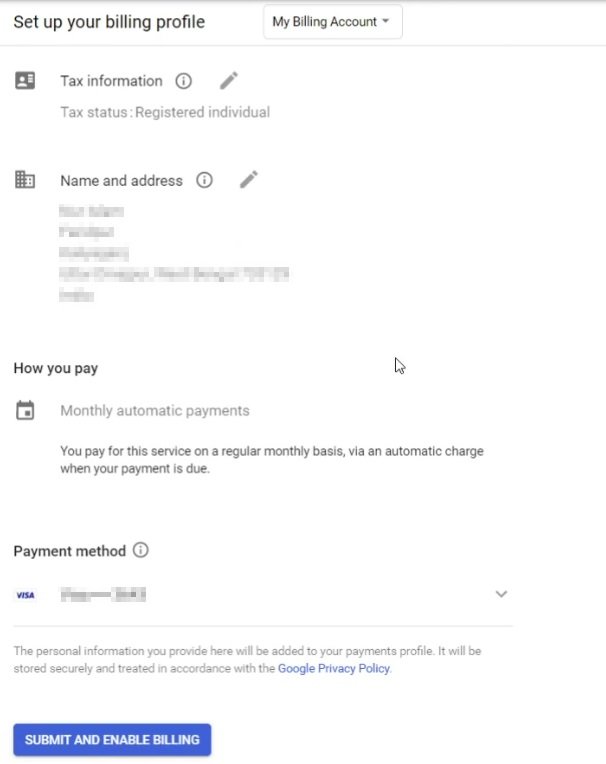
If you are logging in to the Google Map API(Google Cloud Platform) for the first time, you need to set up your billing account. Create your billing account with the instructions provided by Google and add your credit/debit card.
STEP: 4
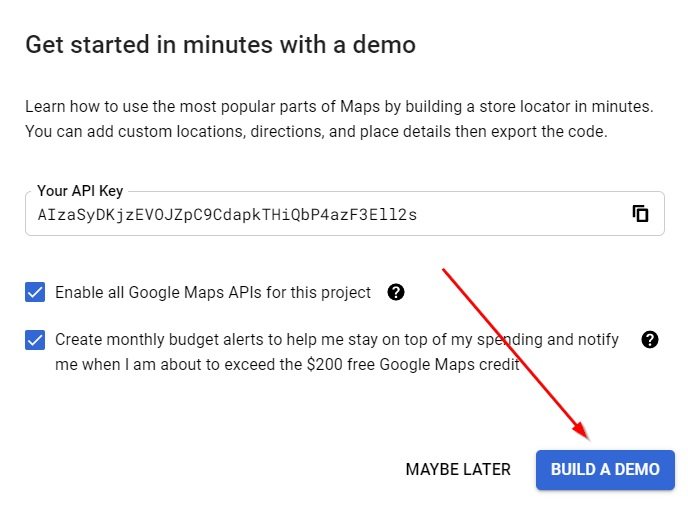
After completing the billing account creation and filling in the additional information, you will see an API Key. It will automatically activate the necessary services(including Google places) which you need for the autofill checkout. It would help if you pasted this API key on the plugin.
But before this, you should restrict the API key. So that no one else can use(misuse) the API key, click on the BUILD A DEMO button to continue to the Google Cloud Platform.
If Google Cloud Platform does not create the Google Maps API Key for your account, then you need to create the API Key manually. Follow the steps…
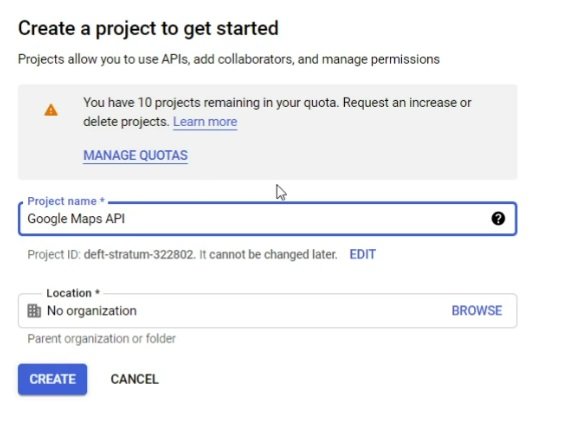
A. Create a new project on Google Cloud Platform. You can name the project anything you want.
B. Set up a billing profile if you didn’t set it up earlier on the Google Cloud Platform.
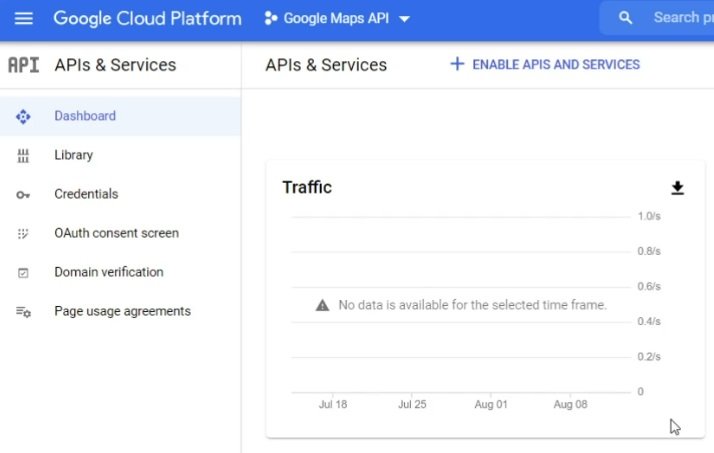
C. Under APIs and Services, click on ENABLE APIS AND SERVICES
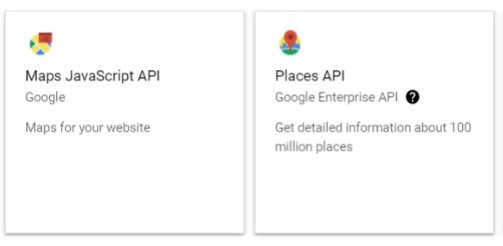
D. Click and enable the Maps JavaScript API and Places API one by one.
E. Under the Credentials menu, click on CREATE CREDENTIALS and click on the API key. It will create an API key for the project.
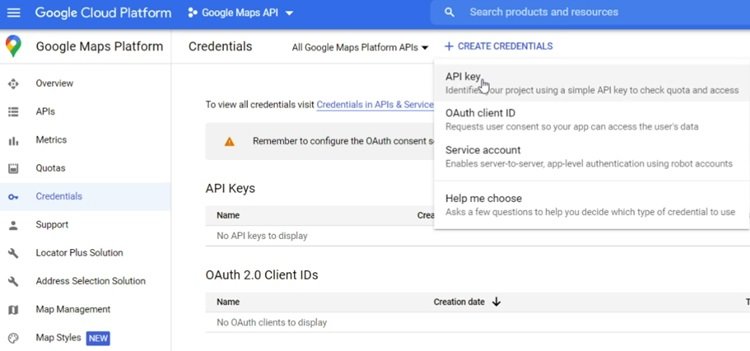
Continue to the next steps…
STEP: 5
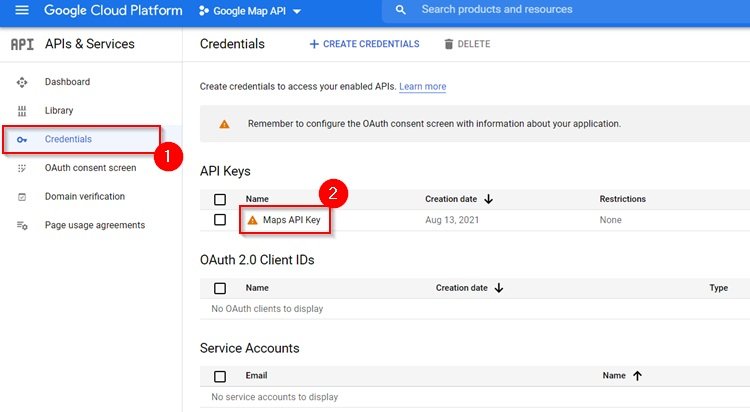
On the Google Cloud Platform, select Credentials from the left menu. Select the Maps API Key under the API Keys list.
STEP: 6
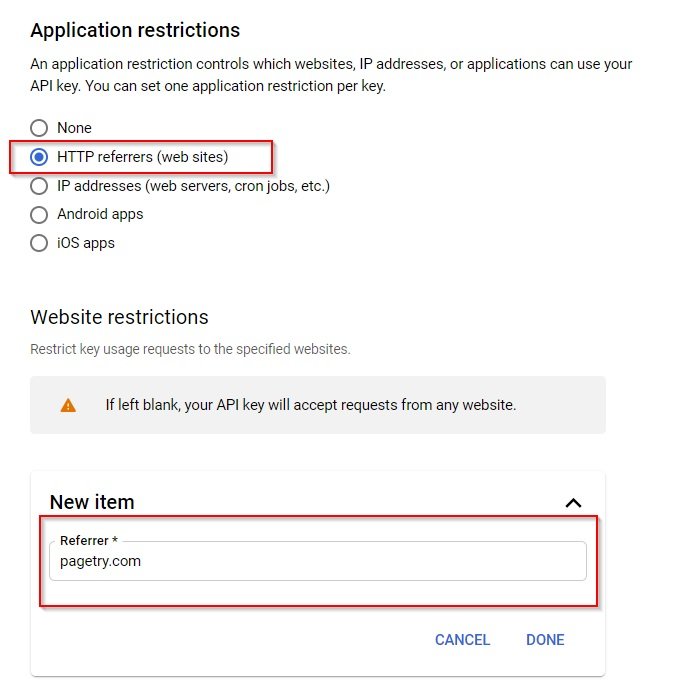
Under Application restriction, select HTTP referrers(web sites). This will let you add the websites for which you want to allow the Google Maps API key.
Next, under Website restrictions, add your website(without www or https). You can add multiple websites here to use the Google Maps API on different websites.
STEP: 7
If you haven’t copied the API key before(step 4), you need to copy the API key for the plugin. To copy the API key, open Credentials > API Keys > select Maps API Key. You will see the API Key at the top-right of the window.

STEP: 8
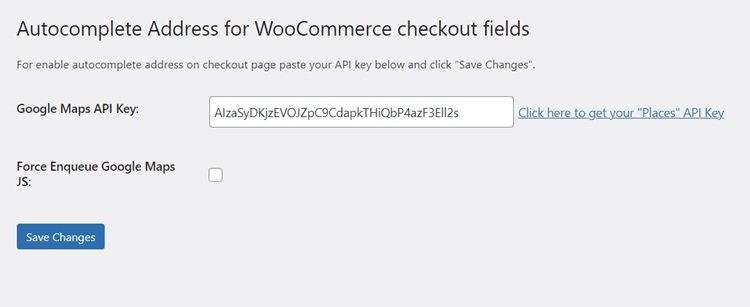
Open the Autocomplete Checkout Address plugin page under the WooCommerce menu and paste the API Key. Save the changes.
The setup process is complete now. To check the autofill checkout fields, open the checkout page and try with some addresses.

ALSO CHECK OUT:
- How to remove shop/category/product slug from WooCommerce URL.
- How to display WooCommerce products on blog posts.
FAQ on WooCommerce Autofill Checkout Address
Can I enable Autofill Checkout Address on any WooCommerce website?
Yes, with Address correction autocomplete for Woo plugin and Google Maps API, you can enable it for all types of WooCommerce websites.
Do I need to pay for the Autofill Checkout plugin?
The Autofill checkout plugin mentioned in this guide is completely free, and the plugin setup is straightforward. You just need to paste the API key from Google Maps.
Do I need to pay Google for the Maps API key?
Google offers $200 monthly credit for free. For most of the users, it will not exceed. Check out the pricing.
How do I know when my card will get charged?
Google will send you a notification before charging from the card. You will get an option to continue or not.
Does Google Charge for the Billing Verification?
Google may charge a small amount from your card for the verification.
Jaded by the 9 to 5 work as an executive in charge of a large enterprise department`s technical direction, he made his way back to his passion. More than dozens of created websites later, he is now an author of a range of programming courses for beginners up to first-rate working professionals.
Write him to nur@positivegeek.com
- Create Custom Mailbox for Free - December 25, 2021
- How to Enable WooCommerce Autofill Checkout Address with Google - August 15, 2021
- How to Manage Affiliate Links Professionally - August 8, 2021


Thanks for the tutorial! I am going to need later on. I’m planning to sell my digital products on my site as well.
I think I came to the right place.