In one of the previous articles, I have explained how to connect custom domain emails with Gmail/Yahoo. This article will guide you through creating a custom domain mailbox (like hello@yourname.com) without a hosting plan or a mailbox plan and how to access it on your computer and mobile device. If you do not want a website and need the mailbox only, you do not need to purchase a hosting plan.
Create Custom Mailbox (hello@yourname.com)
We are going to set up the whole process on Zoho. If you already have a domain, you can connect the domain with Zoho for your free mailbox. Or, if you have a website with the domain and want to use the Zoho mailbox, you can do that by updating the DNS record on your hosting account. Let’s see the step-by-step process.
1. Domain Registration
The first thing you need for your custom mailbox is a domain name (If you do not have a domain/website already). You can register a domain at a reasonable price on Namecheap. They provide the WHOIS security free for lifetime; this means no one can see the owner details of the domain (It is highly recommended).

Otherwise, you can also register the domain with Zoho.
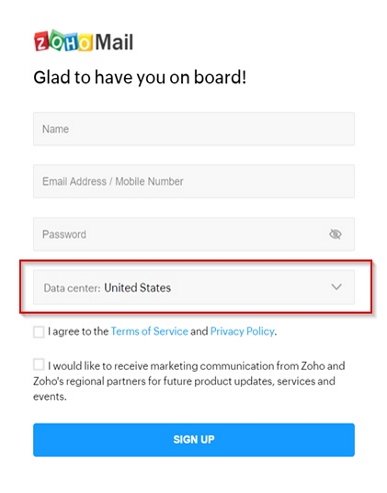
2. Register on Zoho
Log in to Zoho mail and register with the Forever Free Plan. This offers up to five free mailboxes and 5GB storage per user.
Make sure the Data center location is the nearest to you on the registration page. Usually, it detects your computer’s IP and selects the nearest data center.

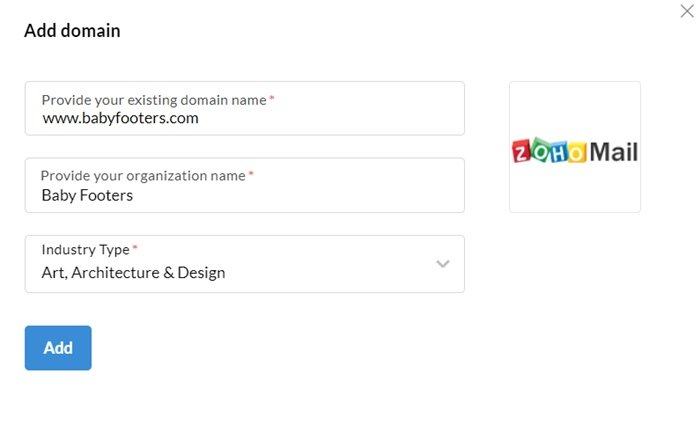
3. Add your domain name
After signing in to the Zoho mail dashboard, you will see two options, Add an existing domain and Buy a new domain. I always register my domains with NameCheap, so I will add the domain here.

After choosing the option Add an existing domain, it will ask for the domain name and your organization details. If you are creating the mailbox for your personal use, use your name there, and select a type of organization from the list.
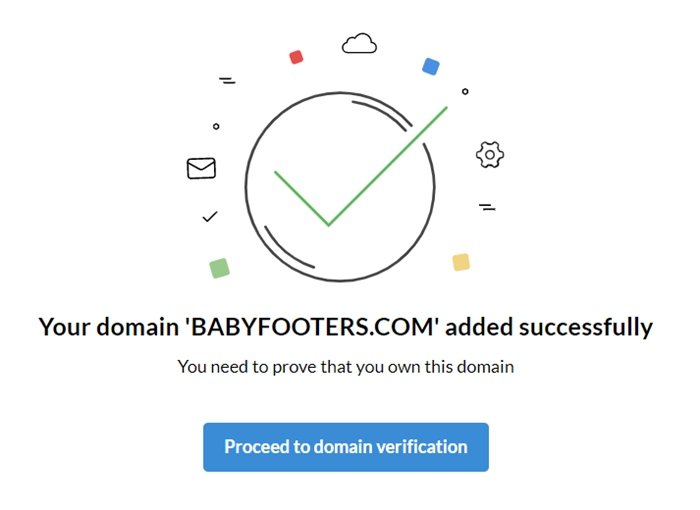
4. Domain Verification on Zoho Mail
When you add a new domain to your Zoho Mail account, you need to verify the domain with Zoho. Like on the below screenshot, you can see.
It will show you a TXT record which you need to add to your domain DNS configuration page. Copy the TXT value and log in to the domain registrar with your account.
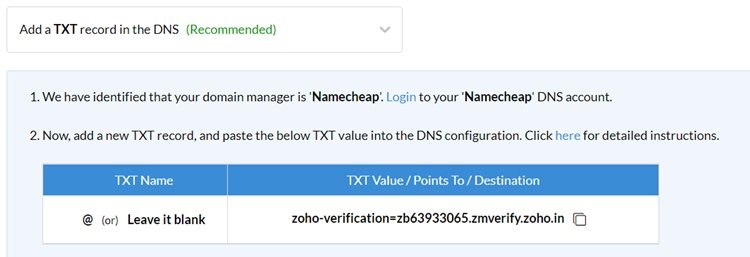
Click on the Manage button on the domain page to open the domain DNS configuration page. For the domain which is already associated with a website, you need to configure the DNS settings on the hosting DNS configuration page.

Select the Advanced DNS on the DNS configuration page and click on the ADD NEW RECORD.
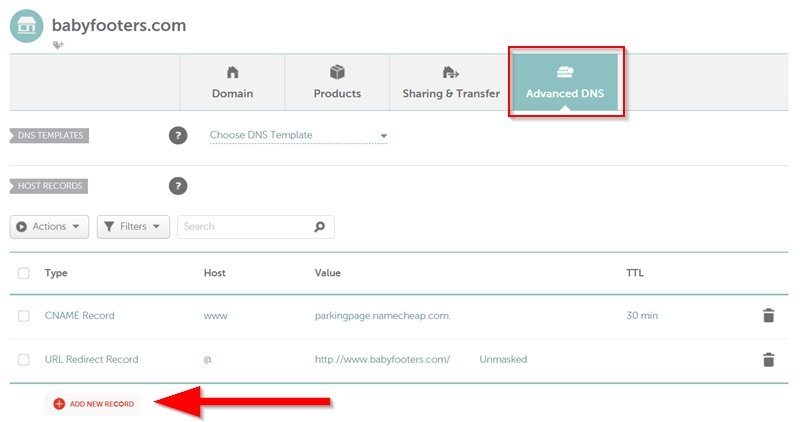
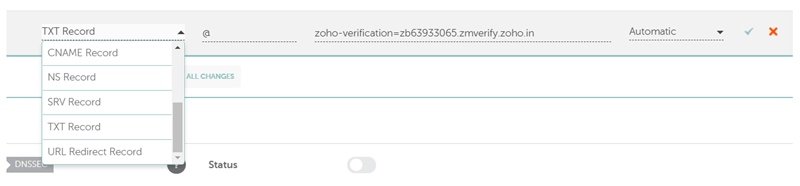
Select the TXT Record from the list and enter the TXT name and TXT value as on the Zoho mail verification page, and click on the tick.
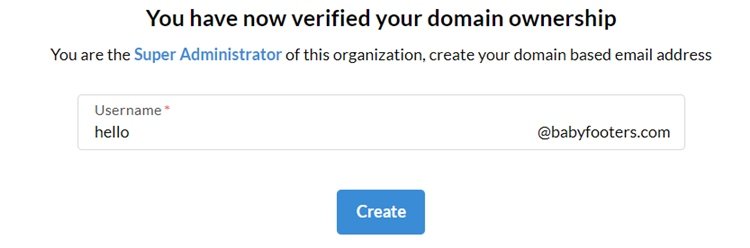
It may take a few minutes to update the TXT record. You can check it by clicking on the verify button on the Zoho mail domain verification page. Once it’s updated, you will see the success message, and it will ask you to create your first custom email account with the domain. Create an email account and proceed to the next step.
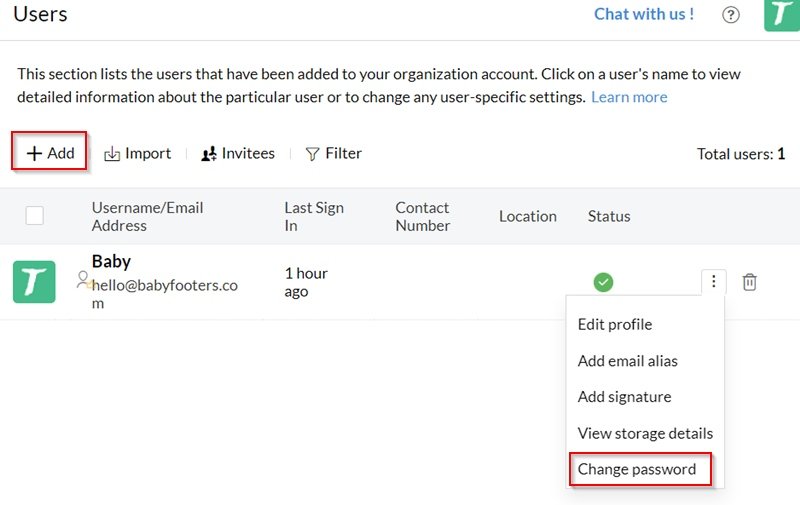
You can set a password for the email account on the next page. You can also add more email accounts on this page; you can always create and delete users whenever you want.
5. DNS Mapping
On the DNS mapping page, you’ll see three types of DNS records. You need to add these on the domain DNS configuration page one by one.
i) MX Records
The first one is MX records; you need to add these records to the MX records section on the domain.

Copy the records one by one and add new MX records to the domain DNS configuration. Under Mail Settings, select Custom MX and add the records as on the Zoho mail configuration page.
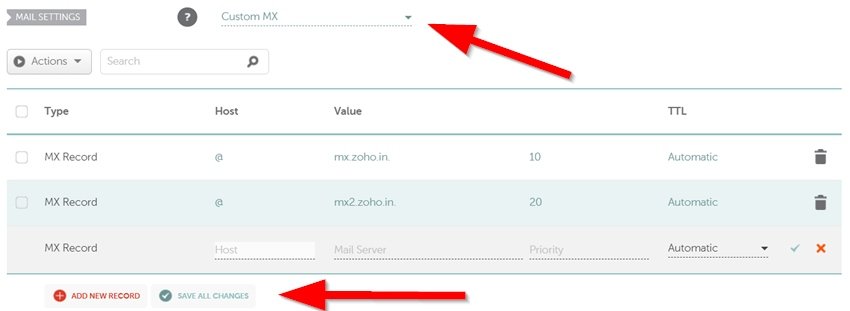
After adding all the records, click on the verify button on the Zoho Mail configuration page. If everything is all right, it will redirect you to the next step.
ii) SPF Records
Copy the SPF record and add a new TXT record to the domain configuration. And save the settings. Check on the Zoho mail if the records were added successfully or not by clicking on the verify option. If it shows the successful message, proceed to the next step.

iii) DKIM Records
Add the DKIM record to the domain DNS. It is the final record you need to add. Add a new TXT record and fill the value as you see on the Zoho mail page. And check with the verify button if the record is updated.

All the setup is now done!
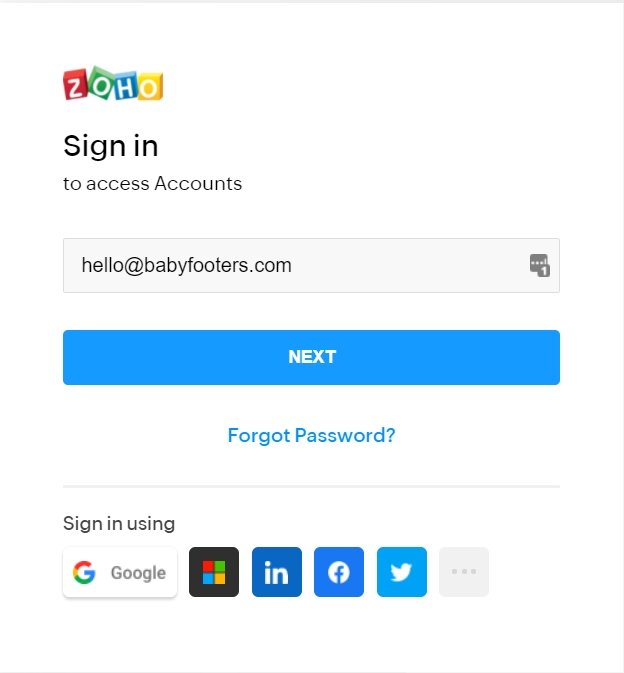
Log In With the Custom Email Account
Now you can use your custom email account with the Zoho mail as a regular email. To access your email account on a browser, use this link: https://accounts.zoho.com/.
Also, you can download the Zoho mail app for your computer (Mac, Linux, and Windows) and mobile (iOS, Android).
Visit the Services page or drop me a mail at hello(at)positivegeek.com when you need my assistance.
Jaded by the 9 to 5 work as an executive in charge of a large enterprise department`s technical direction, he made his way back to his passion. More than dozens of created websites later, he is now an author of a range of programming courses for beginners up to first-rate working professionals.
Write him to nur@positivegeek.com
- Create Custom Mailbox for Free - December 25, 2021
- How to Enable WooCommerce Autofill Checkout Address with Google - August 15, 2021
- How to Manage Affiliate Links Professionally - August 8, 2021


i need to try it free a mailbox pro please