WordPress Jetpack Plugin is packed with many features that may be useful for most of the WordPress users. No matter you are using WordPress for Blogging, Personal Portfolio, E-commerce, or for any other purposes. These features will save you from installing tons of plugins.
In this article, I have explained the best features available for FREE(Jetpack has paid plans also), that you can use to optimize your WordPress website. I have also described how to enable the features correctly and get the most out of it.
- #1. Downtime Monitoring (Notifications on downtime)
- #2. Plugins auto-update
- #3. Brute force attack protection
- #4. Two-Step verification for admin dashboard access
- #5. Jetpack Content Delivery Network(CDN)
- #6. Image Lazy loading
- #7. Jetpack Contact Form
- #8. Automatic Social Sharing by Jetpack
- #9. Site Status ( Analytics )
- #10. Social Sharing Buttons
- #11. WordPress comments with Jetpack plugin
- #12. Jetpack Sitemap generation
- #13. Related posts under the post.
- #14. Site verification with Search engines
- #15. Useful Jetpack widgets
- #16. Infinite Scroll
- Final thoughts
#1. Downtime Monitoring (Notifications on downtime)
Downtime Monitoring feature lets you know when your website is down(is offline) by sending you notifications on your email. Your website may go offline for several reasons.
- Down from Web Hosting side (poor quality hosting).
- Malicious attack.
- Issues caused by plugins.
- Attack from hackers.
- DNS propagate issue.
- And many more…
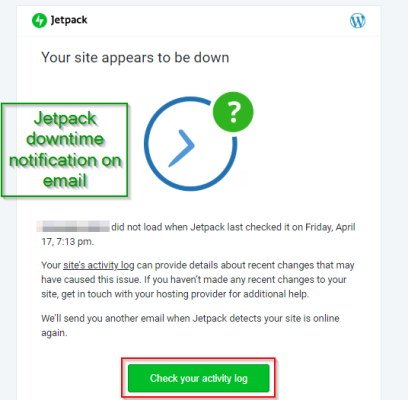
You will receive an email every time your site is unresponsive or down. You can take action by checking the activity and finding the exact issue.
How to enable Downtime monitoring?
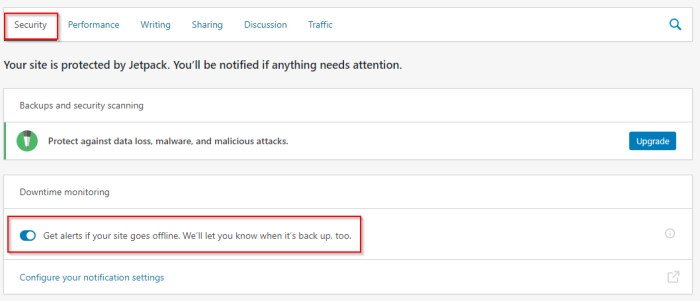
To enable this feature go to Jetpack Settings, under the Security you will find Downtime monitoring. Enable this feature to get alerts on downtime. See the image below for guidance.
Now you will be alerted each time your website goes down.
Guide to secure your website with HTTPS protocol
#2. Plugins auto-update
Updating the plugins regularly (when the updates are available) is a must-do job for WordPress users. It may cause some vulnerability if you do not update the plugins.
With the WordPress Jetpack plugin, you do not need another plugin to take care of this. Jetpack comes with the Auto-update plugins feature.
How to enable Auto-update plugins?
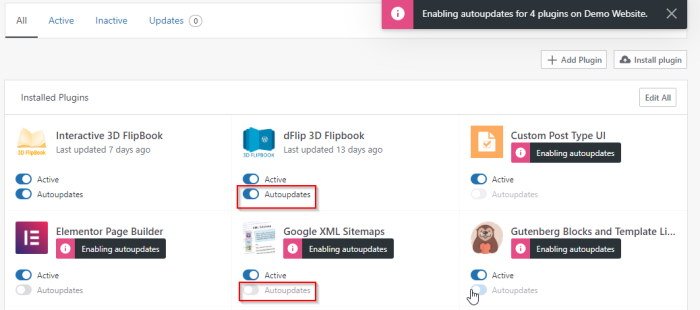
On the Jetpack Settings page, you will find the Auto-update plugins option. Under this click on ‘Choose which plugins to auto-update.’

It will redirect you to the WordPress plugin management page where you can enable plugin auto-update for individual plugins.
#3. Brute force attack protection
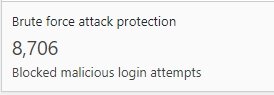
The screenshot above is from one of my WordPress blogs. Jetpack blocked malicious attack for 8706 times on the newly created blog.
Brute force attacks are done by hackers & bots to gain access to the websites. You may lose access if these attackers get access to your website, or it may slow down the speed of your website by sending several requests to the website host.
You do not need any dedicated plugin to save your website from these attackers. Jetpack already has this feature to save your website from attacks.

Under the Security tab on the Jetpack Settings page, you will find this option. You must enable this to secure your website. See the above screenshot for reference.
#4. Two-Step verification for admin dashboard access
Two-Step verification secures you logins with an extra layer of security. Nowadays most of the login systems on the web are secured by this two-step verification method.
You can apply the two-step verification for your WordPress admin without adding another plugin if you have installed the WordPress Jetpack plugin.
How to enable Two-Step verification?
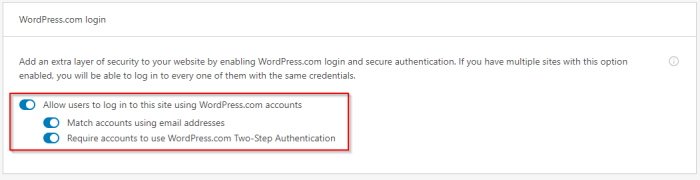
- On the Jetpack Settings page, you can see this option under the Security tab.
Allow the two-step verification option as in the screenshot below.
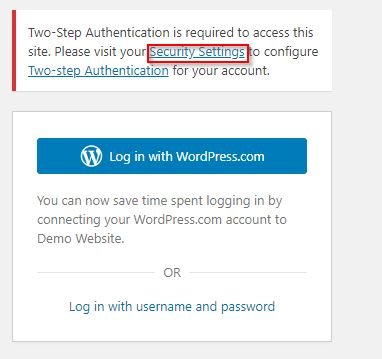
- Log out from the admin dashboard. Now you can see log in with WordPress.com option on the admin login page. Click on the Log in with WordPress.com button.
It will ask you to configure the two-step verification first. Go for the configuration.
- Now on the Two-Step Authentication page enter your phone number and verify your phone number for two-step verification.
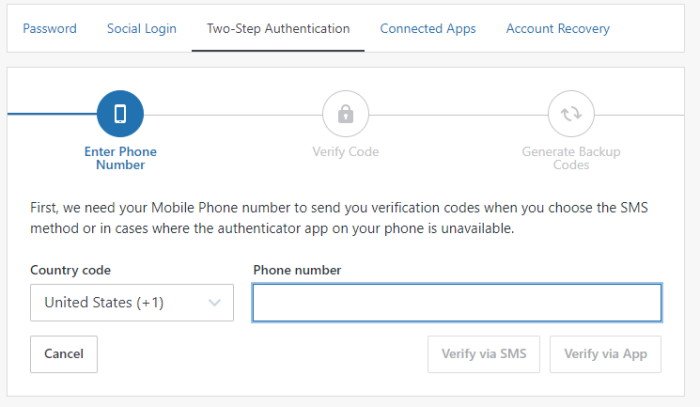
On the next screen, you will be asked to save some verification codes for safety purposes. These verification codes might be useful if you lose access to the mobile number verified with WordPress.
#5. Jetpack Content Delivery Network(CDN)
Content Delivery Network(CDN) serves the static files(images, CSS, javaScript) from its global cloud network. This increases the loading speed of the web pages. You may already know about Cloudflare, MaxCDN, KeyCDN, etc, which are very useful for any website.
With the WordPress Jetpack Plugin, you do not need another CDN service because Jetpack comes with this CDN feature.
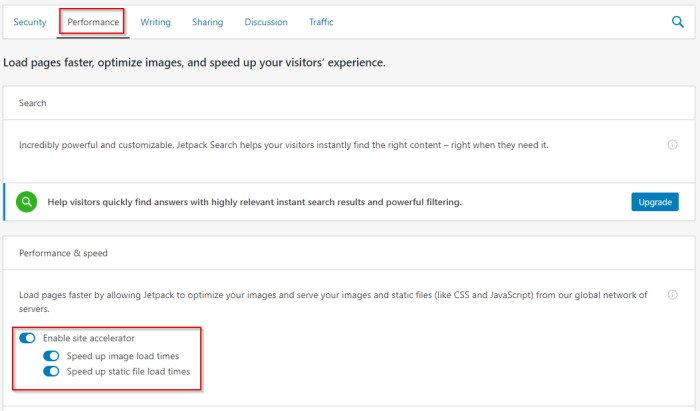
To enable Jetpack CDN, go to the Performance tab under Settings, you can see the site accelerator option. Enable the Site Accelerator for images and static files.
#6. Image Lazy loading
Image lazy loading also increases the page loading speed. If this option is enabled on the WordPress Jetpack plugin, only the images for the visible part will load, the rest of the images will load when the users scroll down the page.
It will significantly increase the user experience. Some Cache plugins come with this feature. But, I noticed, these cache plugins only give you the option to enable when you purchase their premium plans.
You can install a dedicated plugin for the lazy loading feature. But, with Jetpack installed, you do not need to add more plugins.
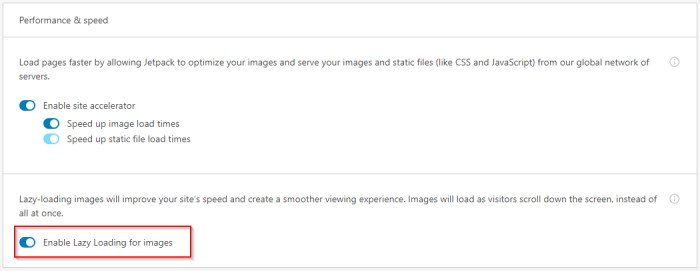
You can enable this feature on the Performance tab.
Enable Lazy Loading for images under Performance & speed.
#7. Jetpack Contact Form
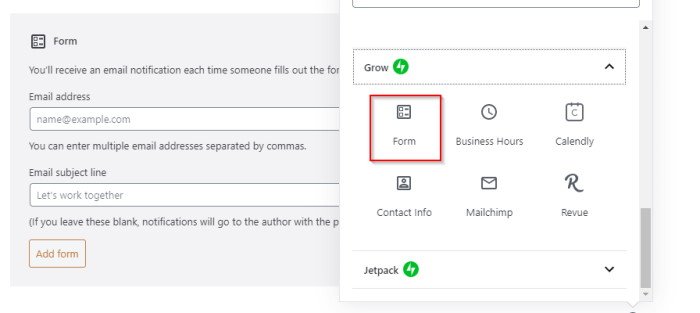
The contact page is the most required page for any kind of website. On the WordPress Jetpack plugin, you will have its contact form. It is enabled by default. If your website needs a form only for the contact page, you do not any other form builder plugin.
When you design a page, you just need to add the contact block; it will let you create the form as per your choice.
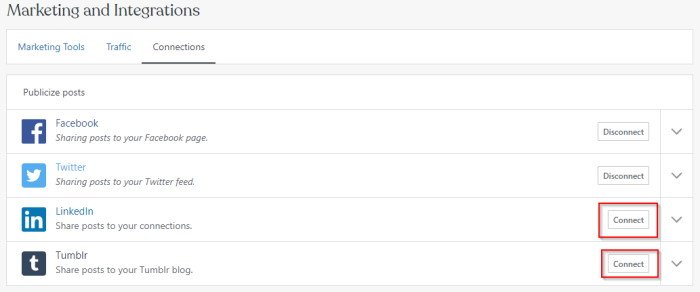
#8. Automatic Social Sharing by Jetpack
Social sharing is an important task to let people know about your work. Each time you write a post on your WordPress blog, you need to share links on the different social media platforms.
This is a bit hectic task, but with Jetpack it can be done smoothly. You just need to connect your social channels with the WordPress Jetpack plugin, that’s it. Next time when you publish a post, the post will be shared on the social platforms you connected with Jetpack.
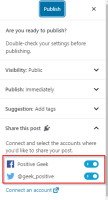
To enable the automatic social sharing go to the Sharing tab and enable the ‘Automatically share your posts to social networks’. You will be asked to connect the social media accounts. Click on the option for the configuration.
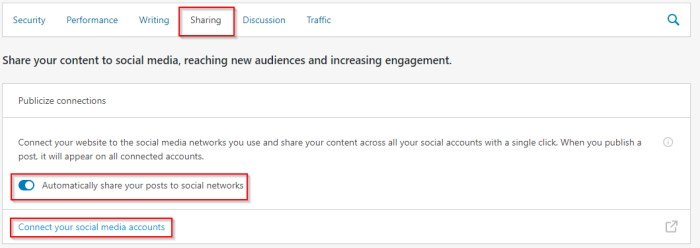
It will redirect you to the WordPress.com to configure social sharing. Connect the social platform where you want to share you post at the time of publishing.
#9. Site Status ( Analytics )
Jetpack comes with the Site Status option enabled. This feature lets you know the number of visitors of your sites and their behavior, where they clicked on the page, from which platform they are coming from, etc.
You can see the complete status of your website with the WordPress Jetpack Plugin Site Stats feature.
On the WordPress Mobile application you can check the status and the details behavior of the visitors.
#10. Social Sharing Buttons
You can enable sharing buttons on your posts and pages by the WordPress Jetpack plugin. So the visitors can share the posts/pages by clicking on these sharing buttons.
It lets the visitors to share the posts on Facebook, Twitter, Pinterest and Telegram.
It has also a like button feature, where visitor can like your posts/pages.
#11. WordPress comments with Jetpack plugin
The WordPress Jetpack plugin has a comment form, which replaces the traditional comment form that comes with the WordPress theme.
This comment form lets the visitors comment with their WordPress, Google, Facebook, and Twitter accounts.
You can enable a subscription option, where the user will be subscribed to the website with his/her email if she/he chooses to subscribe at the time of commenting.
The best part of this comment form is that these comments will be saved on the comments table. Other social comment plugins do not keep the comments on the WordPress comment table. In that case, you will lose the comments when you will disable the plugin.
#12. Jetpack Sitemap generation
The WordPress Jetpack plugin comes with a sitemap generation feature. It will generate site maps for the posts, pages, images.
You can submit the sitemap on the Search Engines like Google, Bing, etc.
It can generate two primary sitemaps one is – sitemap.xml, the post, pages, and images sitemaps generate under this sitemap. Basically, this is the sitemap index. Everything comes under this.
The second sitemap generated by the Jetpack is news-sitemap.xml. The posts & pages published within the last 48 hours get linked to this sitemap.
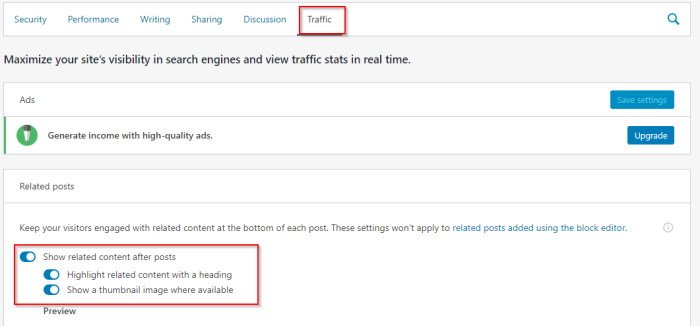
#13. Related posts under the post.
You can enable related posts under the posts. It will keep the visitors engaging with the website.
To enable this feature go to Traffic tab under the Jetpack settings and enable the related posts feature.
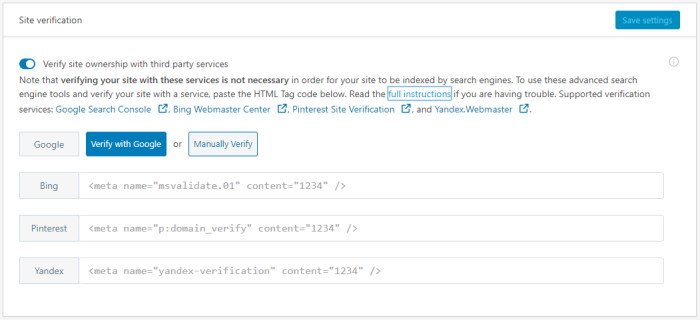
#14. Site verification with Search engines
WordPress Jetpack plugin has a site verification feature. This lets the site verify with the search engines.
You can verify your site with Google, Bing, Yandex, and Pinterest.
To verify with the search engines you need to sign up for the search engines webmaster tools. You will get a meta tag for every search engines, you need to paste the meta tags on the Jetpack site verification panel.
#15. Useful Jetpack widgets
Jetpack has some useful and powerful widgets. These widgets will help you with many purposes.
- Blog Subscription – This widget will let visitors subscribe to the blog by their email. You can grow your email list with the WordPress Jetpack plugin.
- Social media icons – For your social channels you need to showcase the social channels on your blog. You can do this with the Jetpack plugin widget.
- Google Translate – With this widget visitors can read your blog with their readable language by translating the website by Google translate.
- Facebook Page like – You can get likes on your Facebook page by showcasing the page on your website.
- Twitter Timeline – You can showcase the twitter profile with this plugin anywhere on your website.
#16. Infinite Scroll
Infinite scroll lets visitors read posts one by one by scrolling the page. Visitors do not click on any link to read another post. All the posts will come one by one. This will increase the number of visits to the posts of your website.
You can enable this feature on the Writing tab under Jetpack Settings. This feature requires theme support. Your theme needs to support infinite scroll feature.
Final thoughts
This powerful plugin comes with these features that many WordPress users may get benefited from. But some of the features may slow down the loading speed of the pages depending on the hosting server, where the website is hosted. So always choose good web hosting companies. You can check some cheap and fast web hosting out there (Hostinger, BlueHost, DreamHost).
Your suggestions and queries are welcome. You can comment on your queries or can directly contact me through the contact page.
Jaded by the 9 to 5 work as an executive in charge of a large enterprise department`s technical direction, he made his way back to his passion. More than dozens of created websites later, he is now an author of a range of programming courses for beginners up to first-rate working professionals.
Write him to nur@positivegeek.com
- Create Custom Mailbox for Free - December 25, 2021
- How to Enable WooCommerce Autofill Checkout Address with Google - August 15, 2021
- How to Manage Affiliate Links Professionally - August 8, 2021


