What is a Child Theme? Well, Child Theme is a theme that inherits all functionality from a normal WordPress theme(you can call it a parent theme) and works like any other theme.
Why do I need a Child theme? You can customize your WordPress theme to improve or change the theme’s functionality or add any visual customization by adding some codes on the theme’s file. But, when you update the theme, you will lose all the customization you made.
If you make the customization on a Child theme, you will not lose anything when you will update the parent theme. The Child Theme will Inherit all the functionality from the parent theme.
How to create a WordPress Child Theme?
You can create a Child Theme manually by creating a folder & some theme core files on the theme directory on the File Manager of your cPanel. This is time-consuming and hectic (as per my view).
So I will explain here the easiest and fastest process to create a WordPress Child Theme. Also, you can check the manual process by visiting this link.
You need to install a plugin named Child Theme Configurator. The best part of this plugin is that after creating the Child Theme you can delete the plugin. It will not cause any issue if you delete this plugin. Follow the steps below to create a WordPress Child Theme smoothly.
1. Install & Activate the Plugin
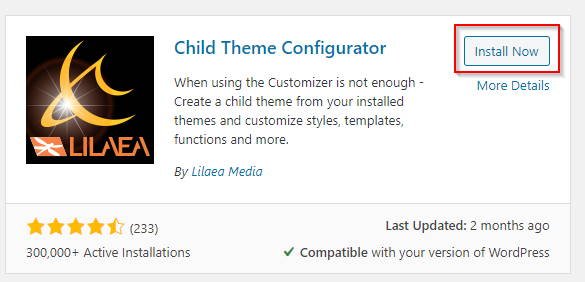
Install the Child Theme Configurator from the WordPress plugins directory. After successful installation, activate the plugin.
Now open the plugin’s configuration window from Tools -> Child Themes.
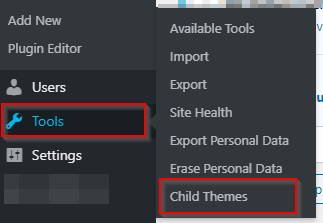
2. Select a Parent theme
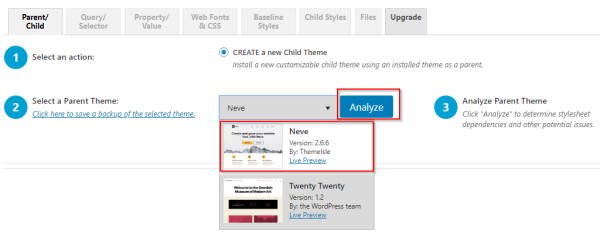
Select the parent theme from the drop down and click on the Analyze button. For my case Neve is the parent theme. You can select any theme from the list.
ALSO SEE THIS: Essential things to do after installing WordPress.
3. Configure the Child theme
Now you need to configure the Child theme properly as follows.
First, name your child theme. By default, it will name the theme by adding the child after the original theme name. You can choose any name for the Child Theme.

Second, leave all the settings as it is. You can change the Child’s theme author, website, etc. This is not mandatory. But you can do this from step 7.
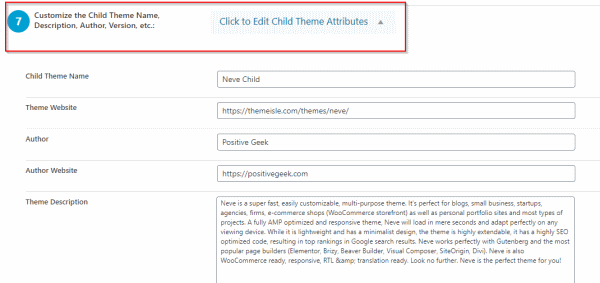
Third, you need to copy the settings for Menus, Widgets or any other customization from the parent theme to function the child theme with the parent theme’s settings. On step 8 check the box.

Finally, click on the Configure Child Theme button at the bottom to create the Child theme. Now you can check the child theme you just created on the Themes directory from the Appearance menu.
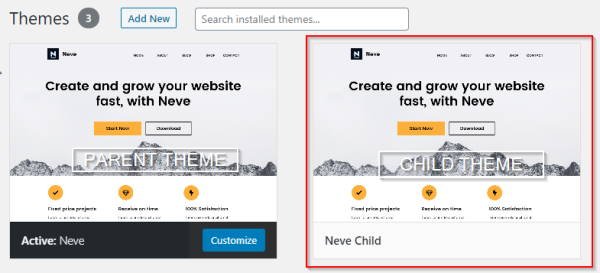
Now you can activate the child theme. You can make any customization by adding custom code on the Child theme. You will not lose any customization if the parent theme updates.
READ ALSO: How to get a FREE SSL Certificate?
Additional Settings
When you need to add any custom CSS code, you can add it directly to the Child Theme’s styles.css file. But, sometimes you may need to add some code to the theme’s header.php or footer.php or on the functions.php file.
You can find the functions.php file under the Child theme directory. The header.php or footer.php will not be created automatically. You have to copy these files from the parent theme.
You can copy the parent theme files by going to the Files tab on the plugin. Select the files you want to copy and click on the Copy Selected to Child Theme button. Now you can add any custom code to these files.
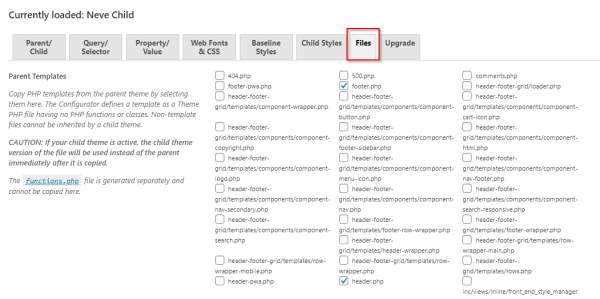
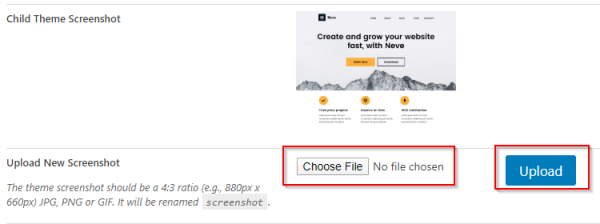
You can change the thumbnail of the Child theme which previews on the Themes panel. On the Files tab you can upload your preferred image to replace the Child Theme’s preview image.
Wrapping up
You can not delete the parent theme, the parent theme function will be inherited by the child theme. Initially, the child theme does not have any functions, so it has to inherit functions.
Now you can delete the Child theme Configurator plugin safely. It will not cause any issue with the Child Theme.
You can post your comments in the comment box below. Any queries/suggestions are welcome.
- Create Custom Mailbox for Free - December 25, 2021
- How to Enable WooCommerce Autofill Checkout Address with Google - August 15, 2021
- How to Manage Affiliate Links Professionally - August 8, 2021


Great and informative steps to follow