Sometimes a plugin update can break the WordPress site, or can break a certain functionality. Especially, when you have the plugin auto-update enabled (see how to enable auto-updates). In that situation, you may need to restore the site to a previous version of the backup to make it work. But restoring the whole website just to rollback a plugin version is too much.
Instead, you can just rollback the version of the specific plugin which has been broken. In this article, I have explained two different methods to rollback a plugin to its previous version.
1. Rollback WordPress Plugin Version Manually
This is a manual method. In this method, you need to download the older version of the plugin from the WordPress plugin repository and install it on the WordPress plugin installation page.
This method is not very geeky, so you can follow this method without any risk. Otherwise, follow the below mentioned 2nd method for rollback plugin version with WP Rollback plugin.
Before following this method it is recommended to create a full backup of the website. Normally, all popular hosting providers have an auto-backup option which creates a backup of the website automatically.
This site is hosted with Hostinger and they have a daily auto-backup option. Or, follow this guide to create a full backup of the site including the database.
Next, follow this step-by-step guide to manually rollback a plugin update.
STEP 1:
Open the plugin’s page on the WordPress plugins repository. You can find the plugin on the following link https://wordpress.org/plugins/.
STEP 2:
On the plugin’s page select Advanced View at the right sidebar.

STEP 3:
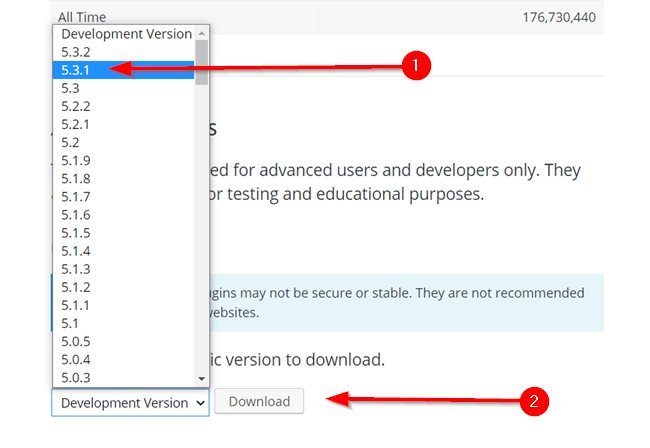
On the Advanced View, section scroll down to the bottom of the page. You will find all the available versions of that plugin under the Development Version dropdown.
Select the version you want to rollback to and download it.
STEP 4:
In this step, you need to install the downloaded version of the plugin using the manual plugin installation method.
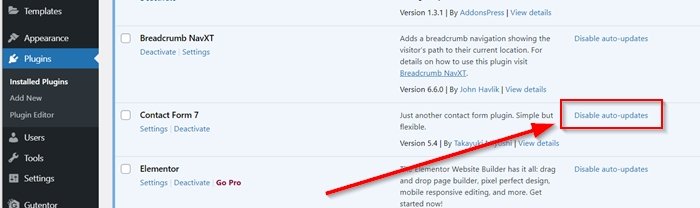
But, before that, make sure that the auto-update for that plugin is disabled. Otherwise, again it can get updated automatically to the newer version, and you may face the same issues.
To disable auto-update open the Installed Plugins page and click on the Disable auto-update link.
After disabling the auto-update, open the Add New page under Plugins. Then, click on the Upload Plugin button.
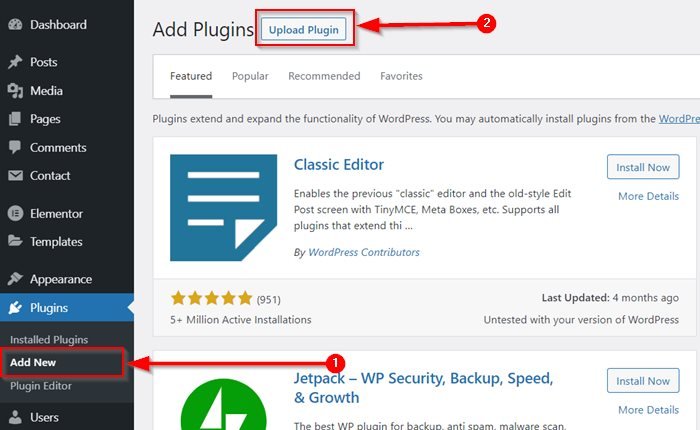
Click on the Choose File button and select the downloaded plugin zip file, and click on the Install Now button.

On the next screen you can see the installed version and the version you are going to install. You will be asked if you want to replace the current version with the uploaded. Click on the Replace current with uploaded to proceed the plugin version rollback.

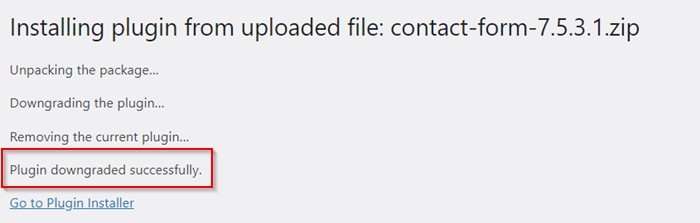
On the next screen, you will get a message that the plugin downgraded successfully.
2. Rollback WordPress Plugin Version using WP Rollback
Using the WP Rollback plugin you can rollback plugin versions in a few clicks.
It is recommended to make a full backup including the database of the site before the rollback of the plugin version.
STEP 1:
Install and activate the WP Rollback plugin to your WordPress website.

STEP 2:
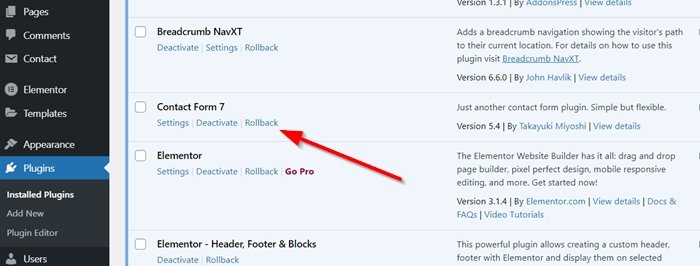
After installing the plugin you can see the Rollback option under the plugins on the WordPress Plugins page.
To rollback a plugin version click on the Rollback link.
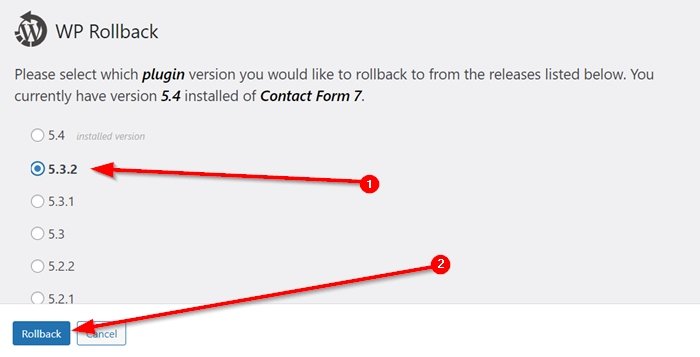
STEP 3:
Select the version you want to rollback to and click on the Rollback button.
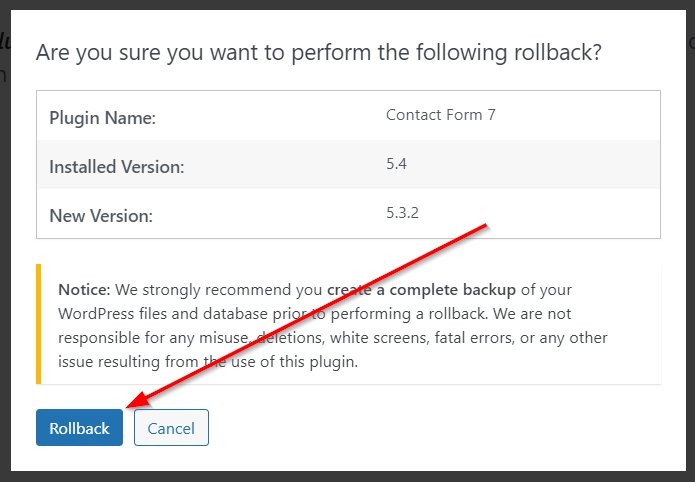
STEP 4:
It will ask for your confirmation to perform the rollback. Click on the Rollback button to proceed with it.
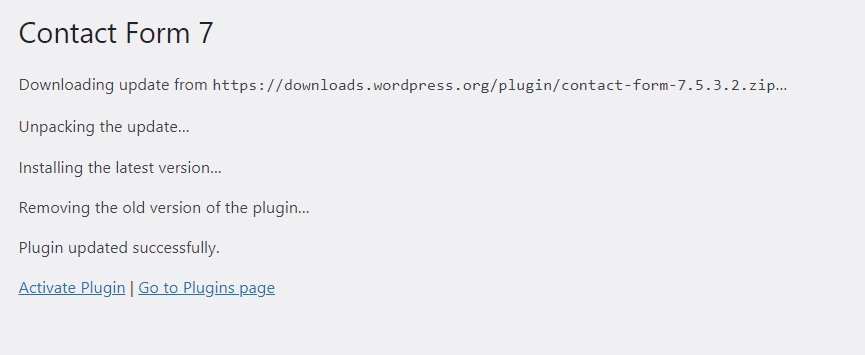
Finally, you will get a confirmation message that the plugin updated successfully. Don’t be confused with the message, because it says ‘plugin updated successfully’. Actually, it updated the plugin version with the older version you selected at the time of rollback.
The first method might seem a bit tricky at first sight, and the second one, as any other plugin installation, might cause some unpredictable problems with the website.
So, if you have any issues with your website – leave the headache for professionals! Feel free to contact me through the contact page and get the prompt and qualified aid for your website.
Jaded by the 9 to 5 work as an executive in charge of a large enterprise department`s technical direction, he made his way back to his passion. More than dozens of created websites later, he is now an author of a range of programming courses for beginners up to first-rate working professionals.
Write him to nur@positivegeek.com
- Create Custom Mailbox for Free - December 25, 2021
- How to Enable WooCommerce Autofill Checkout Address with Google - August 15, 2021
- How to Manage Affiliate Links Professionally - August 8, 2021

