You have some products in your WooCommerce store, and you want visitors to buy any of the products from your blog posts or non-WooCommerce pages without visiting any of the WooCommerce pages.
Typically, for WooCommerce products, you need to visit the product page/product-category page/shop page to add the product to the cart or check out the product directly. Fortunately, WooCommerce has some shortcodes that we can utilize to display products or buying options on any page. So, let’s see how to do this.
Display products/buying options on blog posts or pages
STEP: 1
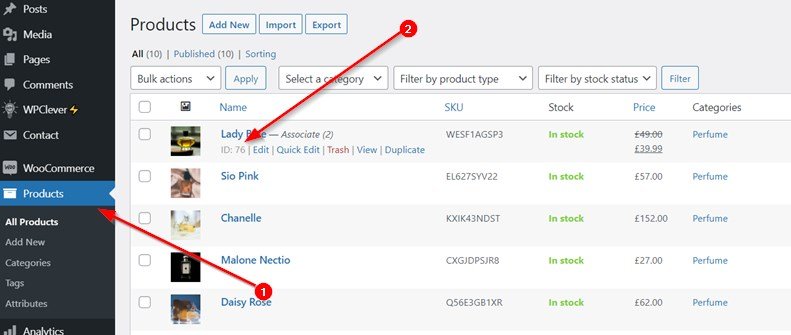
Copy the product ID which you want to display on any blog post or page. You will find the product ID on the product lists page.
Under All Products, move the mouse pointer on the product you want to get the ID of.
You can see the Product ID under the product name.
STEP: 2
Open the blog post in Edit mode or the page where you want to display the product or add to cart option for the product. If the page has been designed with any builder like Elementor, then edit it with Elementor.
STEP: 3
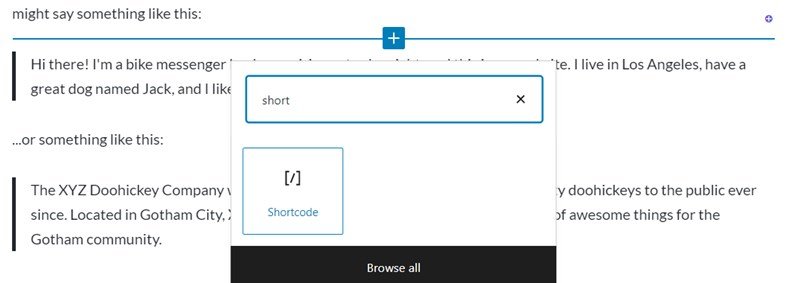
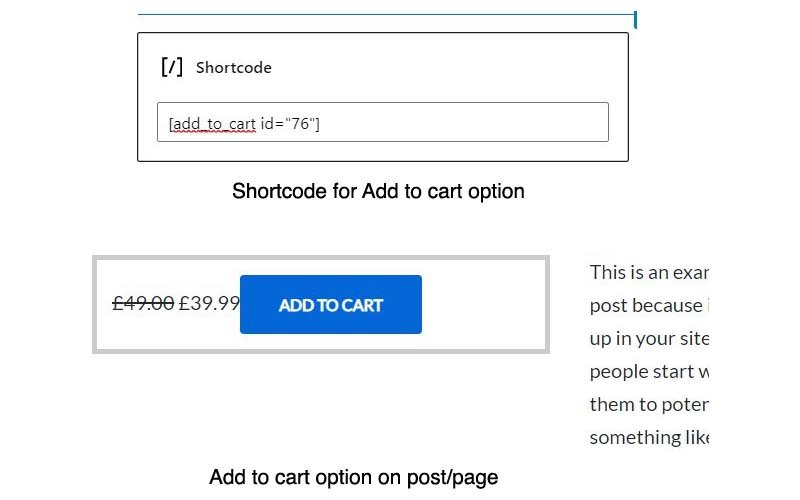
Add a shortcode block.
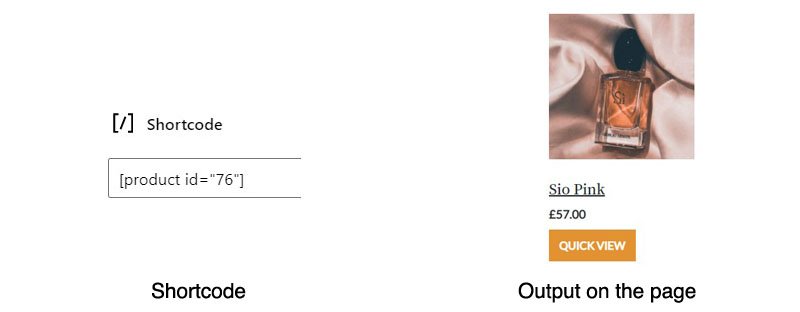
To display the product type [product id=”76″] (replace the numeric ID with your product’s ID) and save the page.
To display only the add to cart button without displaying the product name or any other details, type [add_to_cart id=”76″] (replace the numeric ID with your product’s ID) into the shortcode block and save the page.
Also, you can visit this link for more shortcodes available to use with WooCommerce.
See this guide if you want to remove the product/shop/category term for WooCommerce URLs.
That’s it. Now visitors can buy the product right from the pages or posts. It is beneficial when you have designed a page for a product and do not want the visitors to check the single product page for that product.
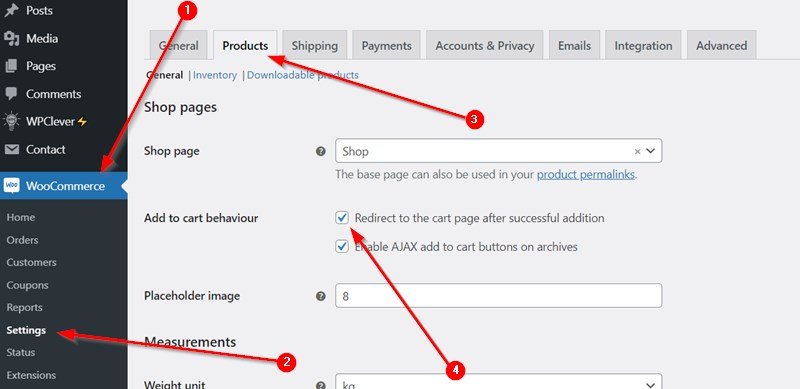
If you want to redirect the buyers to the Cart page when they click on the add to cart button, you need to do it from WooCommerce Settings.
- Open the WooCommerce Settings page.
- Go to the Products tab.
- Check the “Redirect to the cart page after successful addition” option.
Let me know in the comment section if this guide was helpful for you. Your queries and suggestions are welcome.
- Create Custom Mailbox for Free - December 25, 2021
- How to Enable WooCommerce Autofill Checkout Address with Google - August 15, 2021
- How to Manage Affiliate Links Professionally - August 8, 2021

